Beyond the Basics: The Real Secrets to a Thriving Green Garden
For years, I followed the same advice every gardening article seemed to repeat: “Use compost,” “Water in the morning,” “Plant marigolds for pest control.” While these tips aren’t wrong, my garden truly transformed when I started learning the little-known tricks that seasoned gardeners pass down to each other quietly, almost like trade secrets.
These are the green garden hacks you won’t find on most blogs—the ones that make experienced gardeners smile knowingly when they see your thriving plants. I’ve gathered these gems from decades of trial and error, conversations with master gardeners, and those wonderful “aha!” moments when you discover something that changes everything.
If you’re ready to move beyond generic advice and discover sustainable gardening practices that actually work, let’s dive into the secrets that will revolutionize your approach to eco-friendly gardening.
1: Use “Chop and Drop” Mulching for Free Fertilizer
Most gardeners haul their pruned branches and leaves to the compost bin, but here’s what the pros know: you can create a natural fertilizer system right where your plants need it most.
Chop and drop is exactly what it sounds like—you chop pruned material into smaller pieces and drop them directly around your plants as mulch. This technique mimics how forests naturally fertilize themselves, creating a slow-release nutrient system that feeds your soil for months.
The magic happens through the nitrogen cycle. As the fresh green material decomposes, it releases nitrogen gradually, while the woody material provides carbon structure that improves soil texture. Unlike traditional composting, there’s no turning, no waiting, and no hauling heavy bins around your yard.
I discovered this technique when a neighbor, an old-school permaculture enthusiast, showed me how she’d been feeding her vegetable garden for twenty years without buying a single bag of fertilizer. Her secret? Every time she pruned her fruit trees or harvested spent vegetable plants, she’d chop them up with garden shears and spread them right in her beds.
Pro tip: Chop material into 2-4 inch pieces for optimal decomposition speed. Avoid using diseased plant material, and remember that fresh green materials are high in nitrogen while brown, woody materials add carbon.
2: Create a Self-Watering System with Buried Terracotta Pots (Ollas)
This ancient irrigation technique, called ollas (pronounced “OH-yahs”), has been keeping gardens alive in arid climates for over 4,000 years. Yet most modern gardeners have never heard of it.
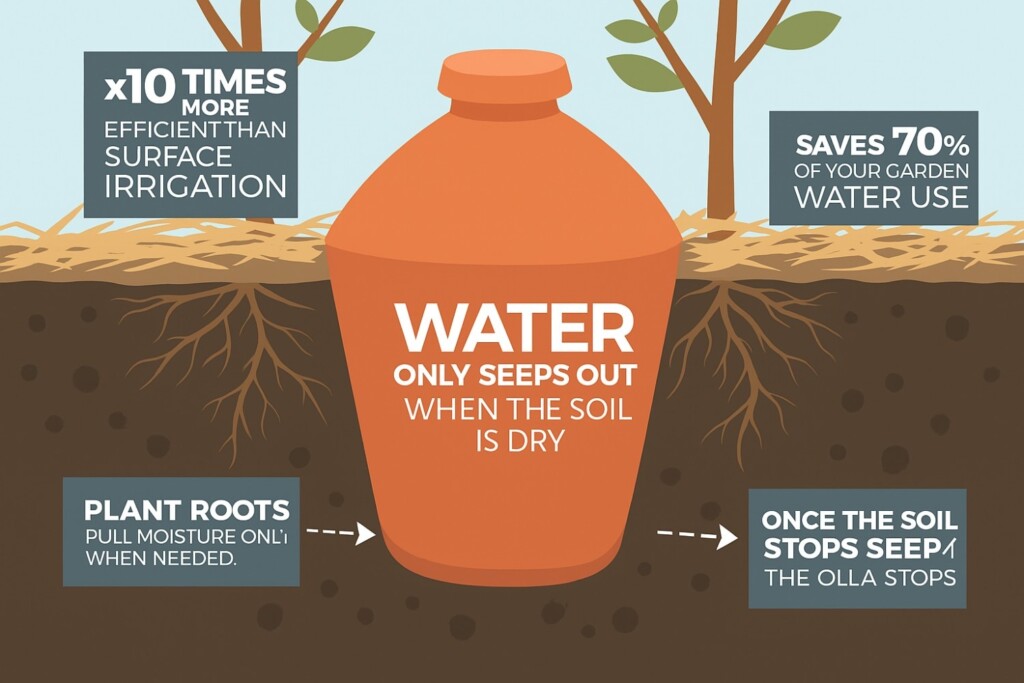
An olla is simply an unglazed terracotta pot buried next to your plants with only the neck showing above ground. You fill it with water, and the porous clay slowly releases moisture directly to plant roots through the soil. It’s like having a underground sprinkler system that never overwaters and reduces water usage by up to 70%.
The genius lies in soil moisture tension. When the soil around the pot is moist, water stays in the pot. When plant roots draw moisture from the soil, creating dry pockets, water seeps through the clay walls to equalize the moisture level. Your plants literally control their own watering schedule.
You can buy purpose-made ollas, but I make mine using two terracotta pots. Take a small pot (6-8 inches), plug the drainage hole with clay or silicone, and bury it with just the rim showing. For larger gardens, use bigger pots or wine bottles with the bottoms removed.
This water conservation method is perfect for vacation watering, drought-prone areas, or anyone who wants to reduce their garden maintenance while improving plant health.
3: Attract Beneficial Insects with a “Bug Hotel”
While most gardeners focus on getting rid of bugs, experienced growers know the secret is attracting the right bugs. A bug hotel is your reservation system for nature’s pest control team.
These structures provide winter shelter and nesting sites for beneficial insects like ladybugs, lacewings, and solitary bees—the predators and pollinators that keep your garden balanced naturally. Unlike chemical pesticides that kill indiscriminately, a bug hotel recruits an army of helpful insects that work for free.
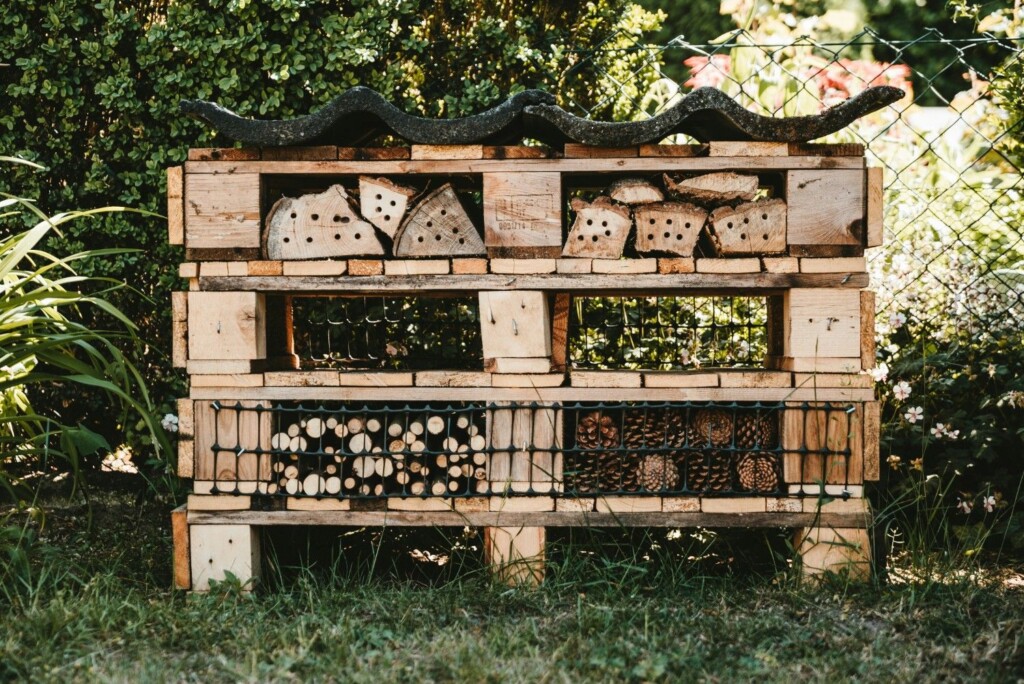
Building one is surprisingly simple. Stack hollow stems (bamboo, elderberry), drill holes in wood blocks (varying sizes from 6-10mm diameter), bundle twigs, or even use broken terracotta pots filled with straw. The key is creating diverse microhabitats since different beneficial insects have different housing preferences.
Place your bug hotel in a quiet corner of the garden, ideally facing southeast for morning sun, and watch as your natural pest control workforce moves in. Within a season, you’ll notice fewer aphids, fewer caterpillar damage, and better pollination rates.
The best part? Once established, beneficial insects reproduce and create a self-sustaining ecosystem that gets more effective each year.
4: Use Diluted Milk as a Natural Fungicide
I was constantly fighting powdery mildew on my zucchini and cucumbers until a neighbor, an organic farmer with forty years of experience, told me to try spraying them with diluted milk. I was skeptical—milk seemed more likely to create problems than solve them—but it worked better than any commercial fungicide I’d ever bought.
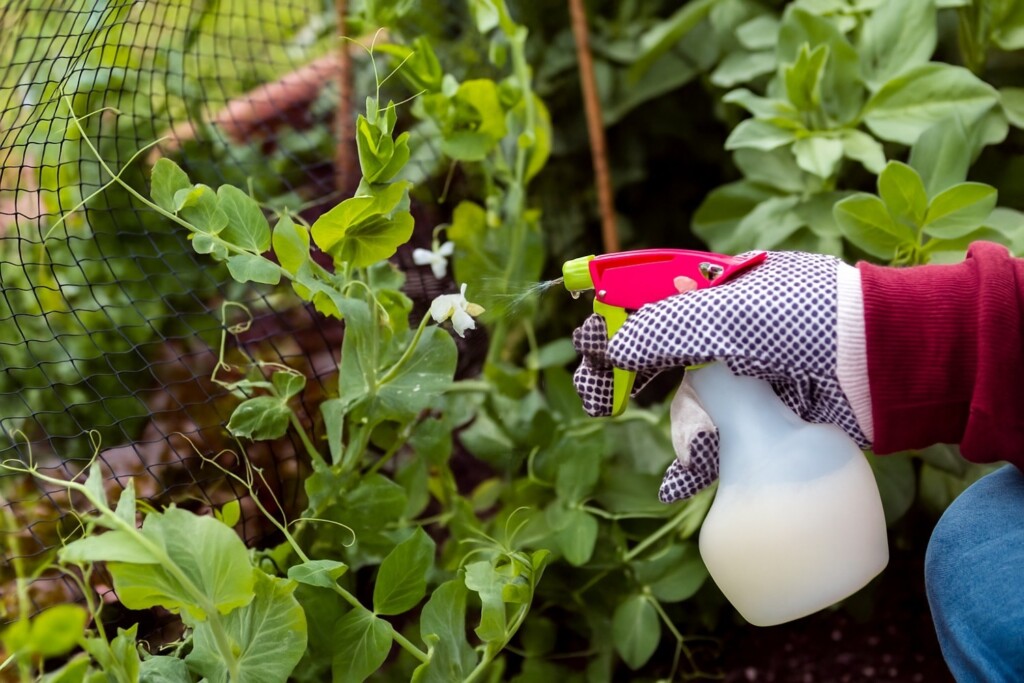
The science is fascinating: lactic acid in milk creates an unfavorable pH environment for fungal spores, while milk proteins actually boost plant immune systems. Research from Australia shows that a 10% milk solution can be as effective as commercial fungicides against powdery mildew, black spot, and other fungal diseases.
Mix one part milk (any kind works) with nine parts water, add to a spray bottle, and apply in early morning or evening to avoid leaf burn. The milk residue disappears quickly, leaving no harmful chemicals in your soil or on your vegetables.
This technique works particularly well on cucurbits (squash, cucumbers, melons), roses, and tomatoes. Apply weekly as prevention or twice weekly when treating active infections. The bonus? You’re feeding your plants calcium and proteins while fighting disease.
5: Plant a “Trap Crop” to Protect Your Main Vegetables
Instead of fighting pests directly, smart gardeners use trap crops—sacrificial plants that pests prefer over your main vegetables. It’s like setting up a pest buffet away from your prized tomatoes.
The strategy works because many pests have strong plant preferences. Nasturtiums attract aphids away from beans and cucumbers. Radishes planted near cabbage family plants draw flea beetles. Sunflowers act as aphid magnets, protecting nearby vegetables while also attracting beneficial predatory insects.
My favorite trap crop combination is blue Hubbard squash planted around the perimeter of my main squash patch. Squash bugs and cucumber beetles are so attracted to the blue Hubbard that they largely ignore my butternut and acorn squashes. At the end of the season, I simply remove the trap crop plants, pests and all.
The key is planting trap crops early—usually 2-4 weeks before your main crop—so they’re established and attractive when pests arrive. Some gardeners even treat their trap crops with organic pesticides, concentrating the pest control effort on sacrificial plants rather than food crops.
This companion planting strategy reduces pesticide use while actually improving overall garden health through increased biodiversity.
6: Improve Clay Soil with Gypsum
Most gardeners struggling with clay soil reach for sand or peat moss, but experienced growers know the secret weapon: gypsum. This naturally occurring mineral transforms heavy clay into workable soil without changing pH levels.
Clay soil’s problem isn’t the clay particles themselves—it’s how tightly they’re packed together, creating poor drainage and root penetration. Gypsum works through flocculation, causing clay particles to clump into larger aggregates with spaces between them for air and water movement.
Unlike lime, which also improves clay but raises pH significantly, gypsum is pH neutral, making it perfect for acid-loving plants or gardens where you don’t want to alter soil chemistry. Apply 1-2 pounds per 100 square feet in fall, work it lightly into the top few inches, and let winter weather help the process.
The transformation isn’t instant—expect to see significant improvement over 6-12 months—but the results are permanent. I’ve seen gardeners go from having to use a pickaxe to dig planting holes to easily working their soil with a hand trowel.
Pro tip: Combine gypsum application with organic matter like compost for even better results. The gypsum opens the soil structure while organic matter feeds beneficial microorganisms that maintain the improvement.
7: Make Your Own Rooting Hormone with Willow Tea or Honey
Commercial rooting hormones work, but they’re expensive and contain synthetic chemicals many gardeners prefer to avoid. The secret? Nature provides powerful rooting stimulants in your backyard.
Willow tea is the most potent natural rooting hormone. Willow bark contains salicylic acid and indolebutyric acid—the same active compounds found in commercial products. Simply soak young willow twigs in water for 24-48 hours, strain, and use the liquid to water cuttings or soak them before planting.
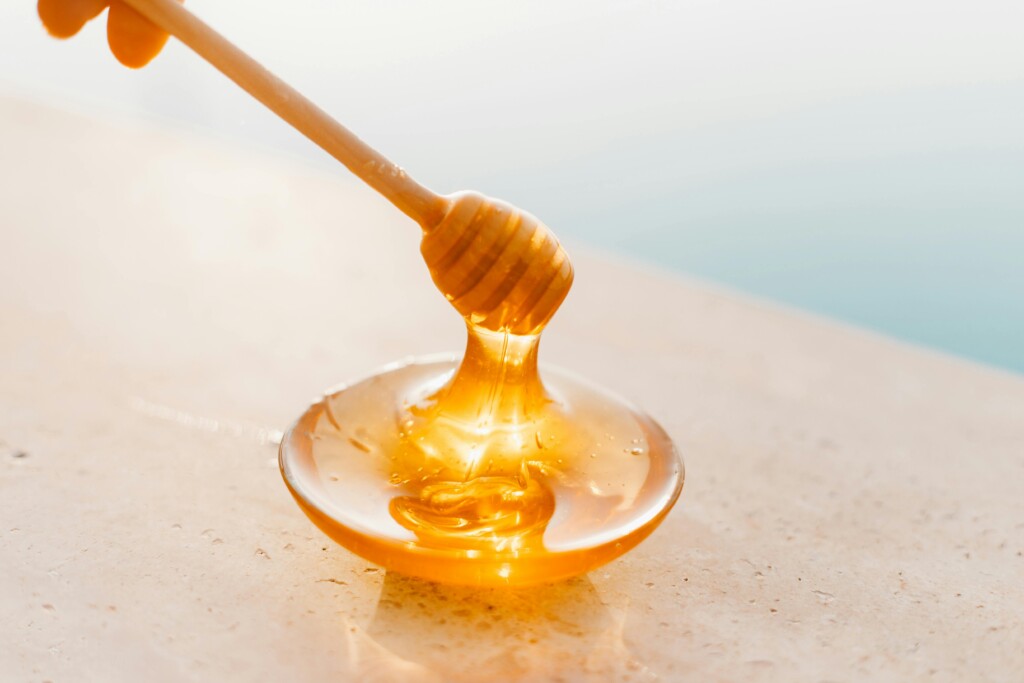
For an even simpler approach, use raw honey. Honey contains natural enzymes and has antimicrobial properties that prevent rot while encouraging root development. Mix one tablespoon of honey in two cups of water, dip your cuttings, and plant immediately.
I discovered the honey method by accident when I was propagating rosemary cuttings and ran out of commercial rooting hormone. Desperate, I remembered reading that honey had rooting properties. Not only did more cuttings root successfully, but they seemed to establish faster with stronger root systems.
Both methods work particularly well with softwood cuttings taken in spring and early summer. Herbs, roses, and many houseplants respond beautifully to these natural treatments.
8: Use Newspaper as a Biodegradable Weed Barrier
Landscape fabric is expensive, plastic versions harm soil biology, and pulling weeds is backbreaking work. The solution hiding in your recycling bin? Newspaper.
Newspaper creates an effective weed barrier that blocks light from reaching weed seeds while allowing water and air to penetrate. As it decomposes over 6-12 months, it adds carbon to the soil and feeds earthworms—essentially becoming compost in place.
Layer newspaper 6-10 sheets thick around plants, overlap edges by several inches, and cover with 2-3 inches of organic mulch to hold it down and hide the appearance. Wet the newspaper first to make it easier to work with and prevent it from blowing away.
This technique works phenomenally well in vegetable gardens and around trees and shrubs. I use it every spring in my tomato beds, laying newspaper pathways between rows and around plants. By fall, the newspaper has decomposed, leaving rich, weed-free soil ready for the next season.
Important note: Use only black and white newspaper or newsprint—avoid glossy inserts or colored inks, which may contain heavy metals or other harmful chemicals.
9: Turn a 5-Gallon Bucket into a Worm Composting Tower
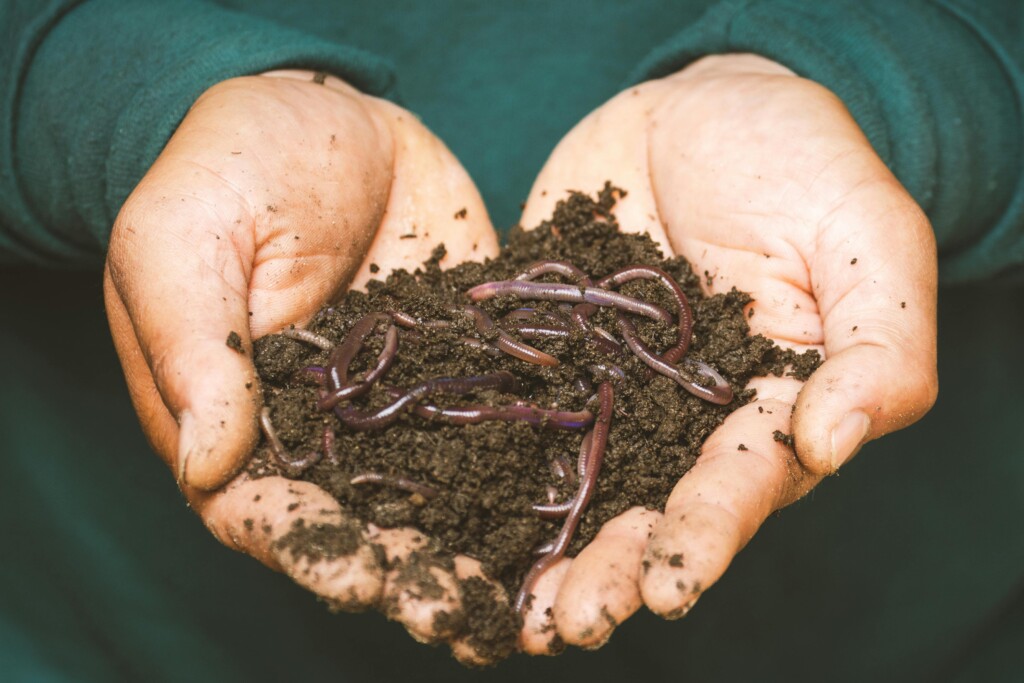
Traditional compost bins take up significant space and require regular turning. A worm tower does the work for you while taking up minimal garden real estate and delivering nutrients directly where plants can use them.
Drill holes throughout a 5-gallon bucket (including the bottom), bury it leaving 4-6 inches above ground, and add red worms with kitchen scraps. The worms process organic matter into rich castings while their movement naturally aerates the compost. Nutrients and worm tea leach directly into surrounding soil through the holes.
The beauty of this system is its continuous operation. Unlike traditional composting that happens in batches, you can keep adding scraps while worms continuously produce castings. Plants within a 3-foot radius show noticeably improved growth and health.
I have three worm towers strategically placed around my vegetable garden. Each one processes about a gallon of kitchen scraps per week while creating fertility hotspots that I use for heavy feeders like tomatoes and squash.
Pro tip: Start with about 100 red worms per tower, avoid citrus and onion scraps, and add dry materials like shredded paper to maintain proper moisture levels.
10: Use Pine Needles as Acidic Mulch for Certain Plants
Most gardeners avoid pine needles, believing they’ll make soil too acidic for everything. But experienced growers know this acidic mulch is perfect for plants that naturally prefer lower pH conditions.
Acid-loving plants like blueberries, azaleas, rhododendrons, and even tomatoes thrive under pine needle mulch. As the needles decompose slowly over 2-3 years, they gradually lower soil pH while providing excellent weed suppression and moisture retention.
My first attempt at growing blueberries was a disaster because my soil wasn’t acidic enough. Commercial soil acidifiers were expensive and needed frequent reapplication. It wasn’t until I learned the simple hack of using pine needle mulch that they finally started to thrive.
Pine needles also create a natural pest barrier. Their resinous properties deter slugs, snails, and some insects, while their loose structure provides excellent drainage around plant crowns—preventing the root rot that kills many acid-loving plants.
Collect fallen pine needles from your own trees or ask neighbors with pine trees. Apply 2-4 inches deep, keeping mulch a few inches away from plant stems to prevent pest and disease issues.
11: “Trench Composting” – The Lazy Gardener’s Secret to Great Soil
Traditional composting requires bins, turning, monitoring temperatures, and patience. Trench composting requires nothing more than a shovel and kitchen scraps—yet it produces some of the richest soil you’ll ever grow in.
Simply dig a trench 12-18 inches deep between plant rows or in areas where you’ll plant next season. Fill it with kitchen scraps, garden waste, and even small branches, then cover with the excavated soil. Worms, bacteria, and other soil organisms do all the work underground, creating incredibly fertile growing medium right where you need it.
This method works faster than traditional composting because materials are in direct contact with soil organisms from the start. Within 3-6 months, organic matter is fully decomposed and integrated into your soil structure.
I use trench composting in my crop rotation system. Each fall, I dig trenches where I’ll plant heavy feeders like corn and tomatoes the following spring. By planting time, the trenches have become fertility zones that feed plants throughout the growing season.
The technique also solves common composting problems: no odors (everything’s buried), no pest attraction, no bin maintenance, and no space requirements. It’s particularly effective for gardeners with limited space or those who generate more organic waste than traditional composting methods can handle.
Conclusion: Your Garden’s Best Kept Secrets
These eleven green garden hacks represent years of accumulated wisdom from gardeners who’ve learned to work with nature rather than against it. Each technique saves money, reduces environmental impact, and often works better than conventional approaches.
The beauty of these methods lies in their simplicity and sustainability. You’re not just solving immediate problems—you’re building long-term soil health, supporting beneficial ecosystems, and creating a garden that becomes more productive and resilient each year.
Start with one or two techniques that address your biggest challenges. Maybe it’s the self-watering ollas if you struggle with consistent moisture, or the bug hotel if pests are your nemesis. As you see results, you’ll naturally want to incorporate more of these time-tested strategies.
Remember, the best gardens aren’t just about what grows above ground—they’re about creating living systems that support themselves. These hacks help you become a steward of that system rather than just a gardener fighting against it.
Your plants, your wallet, and the environment will thank you for making the switch to these sustainable gardening practices. After all, the most powerful gardening tool isn’t something you buy—it’s the knowledge passed down from gardener to gardener, season after season.
designed by freepik

