There’s something truly magical about having vibrant, cheerful tulips blooming on your windowsill while it’s snowing outside. It feels like you’ve unlocked a secret of the seasons. Forcing tulips indoors seems intimidating, but it’s a surprisingly simple process if you follow a few key steps.
The reward is immense: imagine walking into your living room on a gray February morning to find a burst of spring color waiting to greet you. With proper planning and patience, you can create this experience not just once, but repeatedly throughout the winter and early spring months.
First, Let’s Clarify “All Season Long” (The Secret is Succession Planting)
Before we dive into the how-to, let’s address the elephant in the room: what exactly does “all season long” mean when it comes to tulip care indoors?
Here’s the truth that many guides gloss over: each individual tulip bulb will bloom only once, typically for 1-2 weeks. The “all season long” effect doesn’t come from a single plant blooming for months—it comes from succession planting.
This means starting new pots of bulbs every 2-3 weeks throughout the fall and early winter. By staggering your planting schedule, you can have fresh tulips blooming from January through April, creating the illusion of continuous blooms. Think of it as creating your own personal spring parade, with each “float” being a new pot of tulips making its debut.
This approach requires planning ahead, but the payoff is spectacular: a home filled with the colors and fragrance of spring when the outside world is still dormant.
Step 1: Choosing the Right Tulip Bulbs for Forcing

Not all tulips are created equal when it comes to indoor bulb care. Some varieties are naturally better suited for forcing than others.
Best tulip categories for forcing:
- Single Early varieties like ‘Apricot Beauty’ and ‘Christmas Marvel’
- Triumph tulips such as ‘Negrita’ and ‘Strong Gold’
- Darwin Hybrid tulips including ‘Apeldoorn’ and ‘Golden Apeldoorn’
These varieties have been bred to perform well in containers and respond reliably to the forcing process. When shopping for bulbs, look for those specifically labeled as “good for forcing” or “suitable for containers.”
Size matters: Choose large, firm bulbs (typically 12cm/5 inches or larger in circumference). Larger bulbs have more stored energy, which translates to stronger stems and more reliable blooming. Avoid any bulbs that feel soft, show signs of mold, or have obvious damage.
Purchase your bulbs in early fall—September or October—when selection is best and bulbs are fresh. Store them in a cool, dry place until you’re ready to begin the chilling process.
Step 2: The Most Important Step – The Chilling Period
This is where many beginners stumble, and I learned this lesson the hard way. The first time I tried to force tulips, I got impatient and pulled them out of the cold after only 8 weeks. I was rewarded with a pot of beautiful green leaves, but not a single flower. I learned that you cannot cheat the chilling period—it’s the non-negotiable conversation you must have with your bulbs.
Why Chilling is Non-Negotiable (Simulating Winter)
Tulips are hardwired to need winter. In their native habitat, they experience months of cold temperatures before spring arrives. This cold treatment, called vernalization, triggers biochemical changes in the bulb that prepare it to flower, a process detailed by horticultural experts at Purdue University.
Without adequate chilling, your bulbs will produce leaves but no flowers—a frustrating outcome that teaches you to respect the process. The bulb essentially thinks it’s still autumn and holds back its blooms, waiting for the winter that never came.
How to Chill Your Bulbs (The Paper Bag Method)
The easiest method for home gardeners is the paper bag technique:
- Place bulbs in paper bags: Use brown paper bags (never plastic, which can cause rot) and add some slightly damp peat moss or sawdust for humidity control.
Label everything: Write the variety name and the date you started chilling on each bag. Trust me, you’ll forget otherwise.
Refrigerate: Place bags in your refrigerator, ideally in the crisper drawer. Keep them away from apples and other fruits, which release ethylene gas that can damage the flower buds inside the bulbs.
Maintain temperature: The ideal temperature range is 35-45°F (2-7°C). Most home refrigerators maintain this range perfectly.
How Long to Chill (12-16 Weeks is the Magic Number)
Minimum chilling time: 12 weeks for most varieties
Optimal chilling time: 14-16 weeks for best results
Maximum beneficial chilling: 20 weeks (beyond this, you won’t see additional benefits)
During this period, resist the temptation to peek frequently. Bulbs are happiest when left undisturbed. Check once every 3-4 weeks to ensure the peat moss hasn’t dried out completely, but otherwise, practice patience.
Step 3: Planting Your Chilled Bulbs

After your bulbs have completed their chilling period, it’s time to plant. This is an exciting moment—you’re about to wake sleeping beauties from their winter slumber.
Choosing the Right Pot and Soil
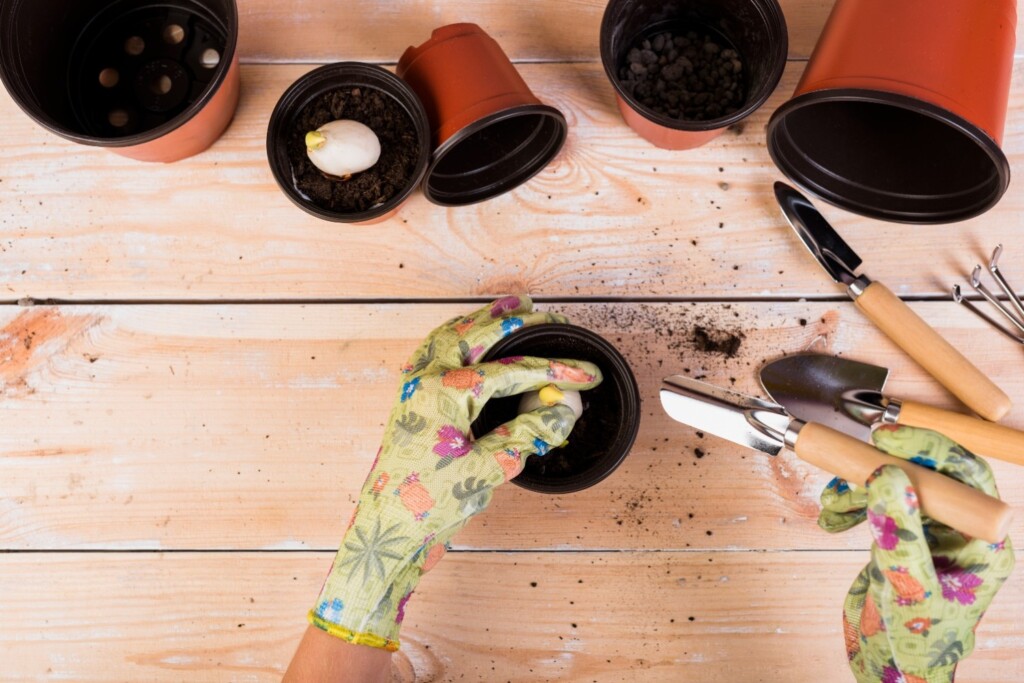
Container selection: Choose pots with drainage holes that are at least 6 inches deep. The width depends on how many bulbs you want to plant—typically, you can fit 3-5 tulip bulbs in a 6-8 inch pot.
Soil requirements: Use a well-draining potting mix. Regular potting soil works fine, but avoid garden soil, which can be too heavy and may not drain well in containers. You can improve drainage by adding a small amount of perlite or coarse sand to your potting mix.
Pro tip: Add a layer of gravel or broken pottery shards at the bottom of your pot to ensure excellent drainage. Tulip bulbs are particularly susceptible to rot if they sit in waterlogged soil.
How to Arrange the Bulbs for a Full Display
Plant bulbs close together for maximum impact—they can be nearly touching. This creates a full, lush display when they bloom. Place the bulbs pointed end up, with the tops just below the soil surface or even with the pointed tips barely showing.
Spacing guideline: Plant bulbs about 1/2 to 1 inch apart for a spectacular show. This is much closer than you’d plant them outdoors, but container growing allows for this intensive approach.
Water thoroughly after planting, ensuring water drains from the bottom of the pot. The soil should be moist but not soggy.
Step 4: The “Waking Up” Period
This phase requires a delicate touch—you’re gradually coaxing your bulbs back to life after their long winter sleep.
Bringing Your Pot into a Cool, Low-Light Area
Immediately after planting, place your pots in a cool area (50-60°F/10-15°C) with minimal light. A basement, unheated garage, or cool closet works perfectly. This simulates the gradual warming that occurs in nature as winter transitions to early spring.
Duration: Keep pots in this cool, dark environment for 2-3 weeks, or until you see green shoots emerging 2-3 inches above the soil surface.
Watering: Check soil moisture weekly. Keep it consistently moist but never waterlogged. Think “wrung-out sponge” consistency.
When to Move it Into Bright, Indirect Light
Once shoots are 3-4 inches tall, it’s time for the next phase. Move your pots to a brighter location with indirect light and slightly warmer temperatures (60-65°F/15-18°C).
Avoid direct sunlight at this stage—it can cause rapid, weak growth. A north-facing window or a spot a few feet back from a south-facing window is ideal.
Watch for the magical moment when flower buds become visible within the green shoots. This typically happens 1-2 weeks after moving to brighter conditions.
Step 5: Caring for Your Blooming Tulips

Once buds are clearly visible, you can move your tulips to their final display location. This is when tulip care indoors becomes about maximizing the show.
Light: Bright, indirect light is still best. Some morning sun is fine, but avoid hot afternoon sunlight.
Temperature: Keep tulips cool (60-65°F/15-18°C) to extend bloom life. Hot conditions will cause flowers to fade quickly.
Watering: Maintain consistent moisture without overwatering. Check soil daily by sticking your finger into the top inch—if it’s dry, it’s time to water.
Support: If stems seem weak, provide support with bamboo stakes or decorative plant supports. Sometimes forced tulips produce shorter stems than their outdoor counterparts, which is normal.
Longevity: With proper care, forced tulip blooms typically last 1-2 weeks. Cooler conditions extend this period, while warm temperatures shorten it.
A Sample Tulip Forcing Timeline
Planning is crucial for forcing bulbs timeline success. Here’s a practical schedule to ensure blooms when you want them:
For January blooms: Start chilling by September 15
For Valentine’s Day blooms: Start chilling by October 1
For March blooms: Start chilling by November 1
For April blooms: Start chilling by December 1
Pro scheduling tip: Start a new batch every 2-3 weeks from September through December to ensure continuous blooms from January through April.
Remember to mark your calendar for planting dates (12-16 weeks after starting the chill) and expected bloom dates (4-6 weeks after planting).
Troubleshooting: Common Indoor Tulip Problems
Even experienced gardeners encounter challenges with growing tulips in pots indoors. Here are solutions to the most common issues:
Why Are My Stems So Short?
Short stems are the most common complaint with forced tulips. Several factors can cause this:
Insufficient chilling: The most common cause. Bulbs need their full 12-16 weeks of cold treatment. Cutting this short almost always results in abbreviated stems.
Too much heat too quickly: Moving bulbs from cold storage directly to a warm, bright location shocks them into rapid, weak growth. Always use the gradual transition described in Step 4.
Overcrowding: While we plant bulbs close together for visual impact, extremely tight spacing can limit stem development. Leave at least 1/2 inch between bulbs.
Solution: For future plantings, ensure adequate chilling and gradual temperature transitions. Current short-stemmed tulips will still bloom beautifully—consider them “dwarf” varieties and enjoy them as table arrangements.
Why Did I Get Only Leaves and No Flowers?
This heartbreaking scenario usually has one primary cause: inadequate chilling. Without sufficient cold treatment, bulbs produce foliage but reserve their energy instead of forming flowers.
Other possible causes:
- Bulbs were stored too warm before chilling
- Temperature fluctuations during the chilling period
- Very old or poor-quality bulbs
- Exposure to ethylene gas (from fruits) during chilling
Prevention: Always provide the full chilling period, maintain consistent cold temperatures, and use fresh, high-quality bulbs.
What to Do After Your Tulips Have Bloomed (Can They Be Replanted?)
This question touches many gardeners’ hearts—can these beauties live on after their indoor performance?
The honest answer: Forced bulbs rarely bloom successfully again. The forcing process depletes their energy reserves, and most won’t have enough strength for another performance.
Your options:
Compost them: This is the most practical approach. The bulbs have given you their gift.
Plant outdoors: You can plant them in your garden after the last frost. Some may recover and bloom in future years, but don’t expect immediate results. Allow the foliage to die back naturally to help the bulb rebuild energy stores
Consider them annuals: Like many forced plants, think of forced tulips as temporary indoor decor that brings tremendous joy during their brief performance.
4.Sustainable approach: Many gardeners establish a rhythm of purchasing new bulbs each fall for forcing while maintaining a separate collection of garden tulips for outdoor enjoyment.
Conclusion: Enjoying Spring’s Beauty, Any Time of Year
Mastering tulip care indoors transforms your home into a personal botanical garden where spring arrives on your schedule, not nature’s. The process requires patience and planning, but the rewards far exceed the effort.
The secret lies in understanding that “all season long” means creating your own succession of spring moments. Each pot represents a small miracle—sleeping bulbs awakened by your care and attention into brilliant displays of color and fragrance.
Start planning your first forcing project now. Mark your calendar for chilling dates, gather your supplies, and prepare to discover the deep satisfaction of coaxing spring from winter’s grip. Your future self, surrounded by blooming tulips on a cold winter day, will thank you for taking this journey.
Remember: every expert gardener was once a beginner who decided to try something new. Forcing tulips indoors might seem complex at first, but like all worthwhile skills, it becomes intuitive with practice. Soon, you’ll be the one friends turn to for advice on bringing spring indoors.
For even more detailed charts and visual guides, resources from institutions like the Missouri Botanical Garden can provide expert-level insights
designed by freepik

